Powered By

Powered by Blogger

Senin, 31 Januari 2011

Attack Of The Clones Is A Very Interesting, Unique GTK/Metacity Theme

Attack Of the Clones

Attack Of The Clones is yet another theme created by JurialMunkey (who is also behind Divergence IV: A New Hope) that features a unique Metacity theme and a very interesting combination of light and dark colors.

Attack Of The Clones requires Murrine Engine 0.98 (which is available in Ubuntu 10.10) - if you're using Ubuntu 10.04, install it using the following commands:

sudo add-apt-repository ppa:elementaryart/elementarydesktop
sudo apt-get update
sudo apt-get install gtk2-engines-murrine


To install the theme, download the .zip, extract it, then open the "Appearance Preferences", switch to the "Themes" tab and drag and drop the extracted .tar.gz file onto it.


Download Attack Of The Clones


Thanks to Skies Of Azel for the tip!

Unity Places Files/Applications Is Back, Changes To Ubuntu Classic Desktop [Natty Updates]

Unity Places Files and Applications were available back in Ubuntu 10.10 but were removed when Unity switched to Compiz. An update in Ubuntu 11.04 Natty Narwhal today finally brings these back:

Natty unity places files
(Unity Places Files)

Natty unity places applications
(Unity Places Applications)


For now they are quite buggy and don't always populate with apps/files, their icons are missing and so on, but this is the initial Unity-Places-Files and Unity-Places-Applications in Ubuntu 11.04 so they should receive a lot of updates until Ubuntu 11.04 is out.


Another recent update which I've only noticed today is a change to how the Classic Ubuntu desktop looks (this is the fallback for those running computers that don't support Unity): the "Menu Bar" has been replaced with the "Main Menu" applet and AppMenu (Global Menu) is now default for the classic interface too:

Natty classic desktop

However, the AppMenu doesn't come with autohide like in Unity; further more, the maximized window titlebar isn't remove and the buttons are not displayed on the top panel. But is this about to change?


A few days ago I were telling you about the Ubuntu Software Center who finally got ratings and reviews - initially these didn't work for me but everything works ok today:

Ubuntu Software Center reviews

Ubuntu Software Center reviews


And finally, another recent update brought playlist support for the Sound Menu:

Playlist support ubuntu sound menu 11.04

Minggu, 30 Januari 2011

Last 2 Weeks Top Posts (Weeks 3, 4 - 2011)

  1. Gnome Shell Daily Build (January 24th, 2011) Video
  2. How To Install Photoshop CS4 In Ubuntu (Using Wine And PlayOnLinux)
  3. A Cross-Distro Unified Installer Is On The Way
  4. Automatically Install All The Google Web Fonts In Ubuntu Using A Script
  5. LibreOffice User Interface Mockups (With Sidebar)
  6. Pardus 2011: KDE SC 4.5.5 With A Pinch Of GNOME In One Of The Best KDE-Based Linux Distros
  7. Install KDE SC 4.6 In Ubuntu 10.10 (With Redesigned Activities System, Faster KWin)
  8. Xubuntu 11.04 To Get A New Default Theme Called Greybird [Screenshots]
  9. Ozone: New Lubuntu 11.04 Proposed Theme
  10. Unity 3D Gets New Experimental Options [Ubuntu 11.04 Natty Narwhal]
  11. Qt Applications To Be Evaluated For Inclusion On The Ubuntu CD Starting With Natty+1
  12. GLX-Dock (Cairo Dock) 2.3 Beta Gets MintMenu, Cardapio Applets, Many Other Improvements [Video]

Browse all our weekly top posts.

How To Install Oxygen-Transparent Style In Ubuntu [KDE]

KDE 4.6 Oxygen Transparent screenshot

KDE 4.6 was supposed to ship with a transparent Oxygen style but in the end it didn't make it "due to serious issues (notably with embedded widgets, such as videos) which cannot be fixed at the style level". But that doesn't mean you can't install Oxygen-Transparent. Read on!


Do not confuse Oxygen Transparent with the window opacity - the window opacity (which you can tweak by right clicking the titlebar) makes everything transparent but using Oxygen Transparent, the widgets will still be visible while making everything else transparent!

Before proceeding, please note that even though this is an official branch, it is experimental so use it at your own risk! This will replace your current Oxygen with Oxygen Transparent. Further more, it will likely be erased by any future update of Oxygen by your distribution packages.


Install Oxygen Transparent in Ubuntu


The instructions below should work with KDE4.4 and above, however I've only tested it with KDE4.6 (in Ubuntu 10.10 Maverick Meerkat).

Oxygen transparent kde screenshots


1. Install the required dependencies:
sudo apt-get install build-essential cmake kdelibs5-dev kdebase-workspace-dev libxrender-dev libx11-dev subversion

2. Download the setup script from KDE Look and save it a folder called "oxygen-transparent" (save the file as "oxygen-setup.pl") in your home directory.

3. Run the following commands to start building Oxygen Transparent:
cd && cd oxygen-transparent
chmod +x oxygen-setup.pl
./oxygen-setup.pl

4. Once the script finishes downloading and compiling Oxygen Transparent, run the following command to install it:
cd build
sudo make install

5. Log out and log back it. Now to tweak the transparency, either use Krunner or a terminal and enter: "oxygen-settings" and set the "Background opacity" for both the Widget Style and Widget Decorations to the desired value:

Oxygen transparent


It would be a good idea to check the "Use widget style opacity settings" in the "Widget decorations" so the opacity will always match.

Also in Oxygen Settings, go to Window Decoration > Fine tuning and make sure "Follow hint style" is selected for "Background style".


Revert the changes

Basically you could just set the opacity to 100% and everything should look like before using the script in this post. 

But if you want to completely revert all the changes, open a terminal and copy/paste the following command:
sudo apt-get install --reinstall kdelibs-bin kdelibs5-dev kdelibs5 kdelibs5-data kdelibs5-plugins kdebase-bin kdebase-data kdebase-runtime-data kdebase-workspace kdebase-workspace-bin kdebase-workspace-data kdebase-workspace-dev


Thanks to KoreSource.

XFCE 4.8 Ubuntu 10.04 And 10.10 PPA

XFCE 4.8 was released about two weeks ago, bringing GVFS support for Thunar (so it can now browse remote shares using FTP, Windows Shares, WebDav and SSH), XFCE panel improvements and more.


Here are a couple of XFCE 4.8 screenshots:

XFCE 4.8

This is XFCE too, using the default Xubuntu 10.10 theme:

Xubuntu 10.10 XFCE 4.8


Install XFCE 4.8 in Ubuntu 10.04 and 10.10 via PPA


There was a XFCE 4.8 PPA for Ubuntu 10.04 for some time but none for Ubuntu 10.10  - until today when XFCE 4.8 was uploaded to a PPA so the Ubuntu 10.10 users can enjoy it too!

Add the XFCE 4.8 Ubuntu 10.04 PPA and install XFCE 4.8 using the following commands (32bit only!):
sudo add-apt-repository ppa:alexx2000/xfce
sudo apt-get update
sudo apt-get install xubuntu-desktop

Add the XFCE 4.8 Ubuntu 10.10 PPA and install XFCE 4.8 using the following commands (both 32bit and 64bit):
sudo add-apt-repository ppa:koshi/xfce-4.8
sudo apt-get update
sudo apt-get install xubuntu-desktop

Note: neither of the above PPA repositories are official so use them at your own risk.


If for some reason you want to revert all the changes made by one of the two XFCE 4.8 PPAs above, you can use PPA-Purge (PPA Purge will downgrade all the packages installed from the above PPAs):

- in Ubuntu 10.10, install PPA Purge and purge the XFCE 4.8 PPA using the following commands:
sudo apt-get install ppa-purge
sudo ppa-purge ppa:koshi/xfce-4.8

- in Ubuntu 10.04, you may have to manually install PPA Purge - you can get it from the WebUpd8 PPA. Then, purge the XFCE 4.8 PPA using the following commands:
sudo ppa-purge ppa:alexx2000/xfce

Thanks to Ken Harkey for PPA the tip!

Install Red Eclipse (The Successor Of Blood Frontier) In Ubuntu [Games]

Red Eclipse fps screenshot

Red Eclipse is a free and open source game single and multi-player FPS game which is the continuation of the now-terminated Blood Frontier project.

The game is based on the Cube 2 Sauerbraten engine and takes advantage of the features like a 6-direction height field world model, real-time map editing, light-maps, shader-based lighting effects, integrated physics support, and a particle engine.


Here is a Red Eclipse video:


Install Red Eclipse in Ubuntu


Red Eclipse is currently downloadable through SVN but Giovanni has created a PPA for Ubuntu Maverick so it's now very easy to install (the PPA holds a very recent SVN build) - just open a terminal and copy/paste the following commands:
sudo add-apt-repository ppa:itachi-sama-amaterasu/redeclipse-client
sudo apt-get update
sudo apt-get install redeclipse

The game has almost 1GB so it will take a while to download it, but it is worth it!


If you're not using Ubuntu Maverick, you can try to install the Maverick .deb files:

Or build the game from SVN (not tested!):
svn co https://redeclipse.svn.sourceforge.net/svnroot/redeclipse redeclipse
sudo apt-get install build-essential libsdl1.2-dev libsdl-mixer1.2-dev libsdl-image1.2-dev
cd redeclipse/src && make clean && make install && cd .. && ./redeclipse.sh


Update: the original Red Eclipse repository was updated with the latest Red Eclipse from SVN and includes packages for both Ubuntu 10.04 and 10.10 so you can use that too if you want (you can check and see which of the two has newer packages): https://launchpad.net/~arand/+archive/redeclipse.

Thanks to Giovanni @ Lffl for the PPA!

Sabtu, 29 Januari 2011

How To Get ADB To Work On Ubuntu [Android]

"adb" (Android Debugging Bridge) is a command line tool that comes with the Android SDK which allows you to perform various actions on your Android mobile device.

If you try to run "adb" in Ubuntu you'll get the following error (just an example):
./adb devices
List of devices attached
???????????? no permissions


To fix this, simply run the following commands (firstly "cd" into the android-sdk-linux_x86/platform-tools folder):
./adb kill-server
sudo ./adb start-server


Now adb should work:
andrei@andrei-desktop:~/Desktop/android-sdk-linux_x86/platform-tools$ ./adb devices
List of devices attached
HT0BJRX10210 device


Along with adb, the other tools show now work too, like "ddms" which provides port-forwarding services, screen capture on the device, thread and heap information, logcat, process, and radio state information, incoming call and SMS spoofing, location data spoofing, and more:

Android ddms


Note: you should already know this, but just in case: make sure you have enabled the debugging options on your device to use this (Settings > Applications > Development).


Update: method 2 posted by Roman in a comment below:

1. Do lsusb
2. Find out your USB idVendor and idProduct (example: 0502:3202)
3. Put the following into /etc/udev/rules.d/99-android.rules replacing the values for idVendor and idProduct:

SUBSYSTEMS=="usb", ATTRS{idVendor}=="0502", ATTRS{idProduct}=="3202"
TEST=="/var/run/ConsoleKit/database", \
RUN+="udev-acl --action=$env{ACTION} --device=$env{DEVNAME}"

Displex-Indicator Reaches Version 0.4, Adds Metacity Compositing And Disper Support

Displex

Displex, an application that provides similar functionality as "fusion-icon", but using an Ubuntu appindicator, was updated to version 0.4.

The new version finally fixes the issue with the appindicator icons - if you use Ubuntu Mono Dark or Light, Elementary Monochrome, Faenza or Faenza Dark -, Displex should integrate nicely with no further tweaking.

Displex 0.4 also adds support for Metacity compositing and basic support for Disper and AcerHK (if you need drivers for this, see HERE). Further more, Displex now doesn't display the menu items for the applications which are currently not installed (so if you didn't install Emerald for instance, no menu item for it will show up).


Here are screenshots showing the Disper and AcerHK menu items:

Displex disper

Displex AcerHK


Please note that the Displex developer doesn't own an Nvidia graphics card so if you do and try out the Disper feature, let him know how it works!


Thanks to Arick McNiel-Cho for the tip and last 2 screenshots!

Sublime Text 2 Is A Nice TextMate Alternative For Linux (As Well As Windows And Mac OSX)

Sublime Text 2 Linux

Sublime Text 2 is a TextMate-like text editor currently in alpha which is now available for Linux too (as well as Windows and Mac OSX). The application is not free but its evaluation period does not expire.


Sublime Text 2 comes with a very interesting interface: a sidebar for projects or files and Chrome-style tabs as well as multi-pane editing which includes horizontal, vertical and even a quad pane mode:

Sublime Text 2 double pane


A very interesting feature is "Goto Anything": press Ctrl+P and type something - this will search in both filenames and lines of code across currently open files as well as recently close files. Start your search by using "#" to go to that word line, "@" for symbol or ":" for line:

Sublime Text 2 goto anything


The user interface also comes with a cool minimap which shows you an an overview of your files:

Sublime Text 2 minimap


Other features include macros, various find tools (find in files, find in open files, incremental find), easily switch between project, multiple selection, autocomplete and lots more. And of course, everything is customizable.


Since Sublime Text 2 is currently in alpha, some features are missing. These include distraction free editing, spell checker, bookmarks, a full python API and more - but all these will be coming in the next months.


Download Sublime Text 2 alpha for Linux, Windows and Mac OSX | To run it on Linux, simply extract the downloaded archive and double click the "sublime_text" file.

Update: Sublime Text 2 is now available in a PPA for Ubuntu!


Want most of the TextMate features in Gedit? Try Gmate.


[Info via Sublime Text 2 blog]

Jumat, 28 Januari 2011

Yakuake (Quake-Like Terminal Emulator) 2.9.8 Finally Adds KWin Support

Yakuake 2.9.8 screenshot

Yakuake is a very cool Quake-like drop-down terminal emulator for KDE. If you've never seen Yakuake in action before, check out the following video which I've just recorded with Yakuake 2.9.8 in KDE SC 4.6:


A new Yakuake version was released yesterday (2.9.8) which finally brings support for KWin for handling its window animation (via OpenGL). The new version also comes with keyboard shortcuts to grow terminals in any diretcion and minor bug fixes.

If you're using Ubuntu (Kubuntu) 10.10 and you have installed the latest KDE 4.6, you can install Yakuake 2.9.8 (only works with KDE 4.6+) from a PPA using the following commands:
sudo add-apt-repository ppa:msb/ppa
sudo apt-get update
sudo apt-get install yakuake


If you're not using KDE, you can use Guake instead of Yakuake. If you want split terminals (and other features) too, check out this how-to: How To Get A Quake Like Terminal Under Gnome Using Terminator.

Mechanig: Tool To Easily Perform Various Cleaning (And More) Tasks In Ubuntu

Mechanig

WebUpd8 reader Georgi Karavasilev, inspired by our own Y PPA Manager, has created a GUI tool called Mechanig which you can use to refresh the repositories, upgrade packages, clean leftover .deb and unnecessary packages and more.

In this first version, Mechanig can perform the following actions:
  • Refresh repositories
  • Upgrades packages
  • Removes unnesseary pacakges
  • Removes pacakges that can not be installed from the package list (apt-get autoclean)
  • Removes Deb files downloaded by apt
  • Opimizes apt
  • Optimizes ram

The above operations can be triggered either separately or all at once.


Sure, you can perform all these from the terminal but this application wants to make it easier for everybody to perform these actions from a single UI, without having to remember the commands.

Install Mechanig in Ubuntu

Add the Mechanig PPA and install it in Ubuntu Karmic, Lucid, Maverick or Natty using the following commands:
sudo add-apt-repository ppa:kokoto-java/usu-extras
sudo apt-get update
sudo apt-get install mechanig

For suggestions, bugs and so on, leave a comment here - I'm sure Georgi will be reading.

A Cross-Distro Unified Installer Is On The Way

Developers from Fedora, Ubuntu, Debian, Suse, and Mageia attended to a conference last week in which they've tried to find a way to make "installing and removing software on Linux suck less."

I've kept wondering why all distributions duplicate so much work. Sometimes, there is a good reason, like a radically different technical approach. But sometimes, it looks like we're going different ways just for the sake of doing something ourselves. We should fix this. Cross-distro collaboration is not the way we usually do things, and I believe we're wrong most of the time. Cross-distro collaboration is a cultural shift for us. But it's very well needed.

- Vincent Untz

 It seems an unified way to install software is in the works which will use Ubuntu Software Center as a front-end. Richard Hughes says Ubuntu Software Center will be ported to PackageKit very soon (in the next couple of weeks) and describes how it will work his blog (so check out that link for more info).

Here is a video presenting the summary of Cross-Distro Application Installer meeting:


Oh, and here's something quite interesting from the specs:

Will add several new optional fields to desktop file specification upstream for the proper solution, more details to come soon. This will allows us to search for photoshop and return gimp in the search results.

Thanks to Zsolt Sándor for the tip!

Gnome Activity Journal 0.6.0 Released With Xchat Support, More

Gnome Activity Journal

Gnome Activity Journal - a semantic file browser based on Zeitgeist - has been updated to version 0.6.0, adding quite a few new features.

Gnome Activity 0.6.0 comes with Xchat and Bazaar version control support, drag and drop for tree view and bookmark/pin area as well as some eyecandy tweaks like a welcome screen, usability tweaks, path's label is now clickable and more.

Here are all the new features / improvements in GAJ 0.6.0:
  • Added drag and drop support to the three views
  • Added drag and drop support to the bookmark/pin area
  • Improved items preview adding information tooltip
  • Added tooltip for peeking quickly into categories
  • Added preview for Audio items
  • Added appindicator/Tray icon support
  • Added support for Xchat
  • Added support for Bazaar version control system
  • Eye candy tweaks:
    • Added "welcome screen" showed when the Activity Journal starts and loads the items
    • Go to Today button always highlighted
    • Path's label clickable in MoreInformation window
    • Usability tweaks to the views toolbar
    • Item's categories becomes coloured when containing a searched item

Install Gnome Activity Journal 0.6.0 in Ubuntu

As usual, the latest GAJ is available in the Zeitgeist PPA (unfortunately version 0.6.0 is only available for Ubuntu Maverick). Add the PPA and install Gnome Activity Journal using the following commands:
sudo add-apt-repository ppa:zeitgeist/ppa
sudo apt-get update
sudo apt-get install gnome-activity-journal

Kamis, 27 Januari 2011

Ubuntu Software Center Gets Ratings And Reviews Support [Natty Updates]

An update in Ubuntu 11.04 Natty Narwhal finally brings ratings and reviews to Ubuntu Software Center.

They don't seem functional for now though - I was unable to rate or write a review but I see some applications were rated so maybe this is an issue on my system only. Either way, this is still work in progress so a lot should change later on (Natty didn't even each Alpha 2).

Here are some screenshots:

Ubuntu 11.04 software center ratings

Ubuntu software center reviews

Rabu, 26 Januari 2011

Google Announces Android 3.0 "Honeycomb" Platform Highlights

Android 3.0 honeycomb screenshots

Google just announced the Android 3.0 Honeycomb platform highlights which include tons of new features such as a new "holographic" UI theme, an interaction model that builds on multitasking, notifications, widgets, and many others.

There's a lot going on under-the-hood too: Android 3.0 will get support for multicore processor architectures,new UI framework for creating tablet applications as well as high-performance 2D and 3D graphics:

A built-in GL renderer lets developers request hardware-acceleration of common 2D rendering operations in their apps, across the entire app or only in specific activities or views. For adding rich 3D scenes, developers take advantage of a new 3D graphics engine called Renderscript.


More screenshots and video


Android 3.0 honeycomb screenshots
(Recent applications)


Android 3.0 honeycomb keyboard screenshots
(Copy/paste selection, keyboard)


Android 3.0 screenshots camera
(Android 3.0 camera)


Android 3.0 browser screenshot
(Android 3.0 browser)


And here's a video with Android 3.0 Honeycomb "built entirely for tablet" in action:


Check out the full announcement @ android-developers.


Install KDE 4.6 In Ubuntu 10.10 (With Redesigned Activities System, Faster KWin)

KDE SC 4.6 screenshot

KDE SC 4.6 was released today, brining polish to existing functionality as well as some cool new features and bug fixes.

Probably the biggest change in KDE 4.6 is the redesign of the Activities system which makes it easy to associate applications to activities - once you create some new activities, right clicking an window title you'll have an option to make that application part of a certain activity as you can see in the screenshot below:

KDE 4.6 screenshot

Other improvements include: faster KWin (which now works with more graphics drivers), revamped Power management, rogram start-up notifications are now handled more efficiently revamped notifications system, better integration of GTK applications thanks to a completely rewritten Oxygen GTK theme and of course, updates/new features for most of the KDE applications, like routing capabilities in Marble, advanced filtering and searching using file metadata in the Dolphin and so on.


Nautilus KDE SC 4.6 screenshot
(Oxygen GTK theme)


For more info on KDE SC 4.6, read the release announcements.

Install KDE SC 4.6 In Ubuntu 10.10 Maverick Meerkat

To install KDE 4.6 in Ubuntu 10.10, open a terminal and copy/paste the following commands:
sudo add-apt-repository ppa:kubuntu-ppa/backports
sudo apt-get update
sudo apt-get install kubuntu-desktop

Once installed, log out and select KDE Plasma Workspace from the login window.

Install SubtitleEditor 0.38.0 In Ubuntu Lucid Or Maverick

Subtitle editor

Subtitle Editor is a GTK tool to edit subtitles. It can be used for new subtitles or as a tool to transform, edit, correct and refine existing subtitle. This program also shows sound waves, which makes it easier to synchronise subtitles to voices.

SubtitleEditor 0.38.0 was released about two weeks ago and it includes many bug fixes such as:
  • Fix sort subtitles
  • Opening SEP project wont open a Keyframes file automatically
  • Subtitles in MicroDVD format don't display correct
  • Scale option doesn't work correctly with frame-based subtitles
  • Broken character count (column translation)
  • Unable to set subtitle times after importing plain text
  • Fix English errors

The new version also comes with speed improvements and movie fps dectection.


To provide an easy way to install SubtitleEditor 0.38.0 in Ubuntu Maverick and Lucid, we've backported the Natty package and uploaded it to the WebUpd8 PPA. Install Subtitle Editor 0.38.0 in Ubuntu Maverick or Lucid using the following commands:
sudo add-apt-repository ppa:nilarimogard/webupd8
sudo apt-get update
sudo apt-get install subtitleeditor

Image via Subtitle Editor.

Y PPA Manager 0.0.5, Released

Y PPA Manager

Y PPA Manager is a GUI tool to add, remove, purge, list and search for Launchpad PPAs. It works with Ubuntu and Linux Mint.


Y PPA Manager 0.0.5 was released today - the new version finally adds a GUI for the settings:
  • PPA Purge behavior: auto - don't require any user input; manual - opens a terminal window asking the user how to solve the issue (this is the default and highly recommended behavior).
  • Ubuntu version: this only affects the search. So if you want the Y PPA Manager search to display packages for some other Ubuntu version, simply change the Ubuntu version here. Supported versions: karmic, lucid, maverick or natty (use the Ubuntu version names for Linux Mint too!).
  • Downloads folder: This is the folder where Y PPA Manager downloads the file you select from a PPA (default: ~/Downloads/y-ppa-manager).

Y PPA Manager 0.0.5 also adds a repositories backup/restore feature as well as an option to scan and remove duplicate PPAs (this only works for PPAs which are in separate .list files; it doesn't work if you add the PPAs to the sources.list file). You can find the backup/restore and duplicates scanner under "Advanced" - the PPA Purge feature has also been moved here so it doesn't clutter the UI.

Install Y PPA Manager 0.0.5:
sudo add-apt-repository ppa:webupd8team/y-ppa-manager
sudo apt-get update
sudo apt-get install y-ppa-manager yad

If you encounter any bugs, report them @ Launchpad.

BlueGriffon: A New WYSIWYG Editor Which Supports CSS3 And HTML5

BlueGriffon

BlueGriffon is a new WYSIWYG editor which uses Gecko, the Firefox 4 rendering engine for displaying the web pages. It's cross-platform and runs on Windows, Linux and Mac OSX.

What I like about it is the built-in HTML5 and CSS3 editing features - you can use it to easily apply transforms, transitions, text and box shadows, linear and radial gradients and so on. Further more, BlueGriffon comes with Google Font Directory and FontSquirrel addons so you can easily apply a custom font to your page.

Another interesting feature is the inclusion of SVG Edit - a SVG editor you can use to draw vectorial graphics from within BlueGriffon to embed them into your documents. BlueGriffon will automatically add to your HTML 4 documents the necessary chunk of JavaScript code enabling SVG rendering if you use it.

You can check out all its features @ bluegriffon.org


Install BlueGriffon in Ubuntu


In my test, the latest nightly builds was more stable then the latest release (0.8) so I suggest you use that. Download the latest nightly from HERE.

Even tough there is a .deb file available for download (only for the nightlies), it's better to use the installer because the .deb is only available for 32bit and it creates the executable file in the wrong place. 

Once you've downloaded the installer (its name ends with "-install"), simply right click it, select Properties > Permissions, check the "Allow executing file as program" box and then double click the downloaded file. Once installed, there should be an icon on your desktop which you can use to launch BlueGriffon.


Please note that BlueGriffon is not yet stable so expect to find bugs!


[Thanks to  sourceslist.eu for mentioning BlueGriffon]

Zeitgeist For Gnome Shell Goes Public [Video]

Seif posted a video with Zeitgeist + Gnome Shell in action, which you can view below:


The code is now available for anyone who wants to try it out - for now there's no GIT branch or such and instead, you must download an archive and replace the ~/gnome-shell/source/gnome-shell/js folder with the js folder from this archive. You can downloaded it from HERE.

[via Seif]

Selasa, 25 Januari 2011

LibreOffice 3.3.0 Stable, Released

The Document Foundation launched LibreOffice 3.3.0 today, the first stable release of the community developed free office suite.

LibreOffice 3.3 brings some very interesting new features such as bundled extensions (which provide PDF import, a slide-sow presenter console and more), import and work with SVG files, an easy way to format title pages and their numbering in Writer, a more-helpful Navigator Tool for Writer, improved ergonomics in Calc for sheet and cell management and Microsoft Works and Lotus Word Pro document import filters.

LibreOffice 3.3
(working with SVG images in LibreOffice)

Libreoffice 3.3 screenshot
(bundled extension - Presenter View in Impress)


Download LibreOffice 3.3.0 | Official LibreOffice 3.3.0 release announcement

Note for Ubuntu users: You can install LibreOffice from an Ubuntu PPA; the LibreOffice PPA currently holds LibreOffice 3.3.0 RC4 for both Ubuntu Lucid and Maverick (LibreOffice is default in Natty) - but that's "bit-for-bit identical" to the final LibreOffice version (according to the release notes - thanks to Luigi Pezzotta for the info) so basically installing it you'll have the final version.


Image credits: libreoffice.org

Senin, 24 Januari 2011

Gnome Shell Daily Build (January 24th, 2011) Video

Gnome Shell screenshot

As requested by many of our readers, here is a video showing the latest GNOME Shell daily build (as of January 24th, 2011). There have been many changes to Gnome Shell since our last video, including the overview relayout (which is default for some time), notification changes, side-by-side tiling as well a functional notification area and many other changes.

Unfortunately the Gnome Shell recorder tool doesn't work well with Nvidia graphics cards so I had to make a lot of smaller videos which I've then used to create a single video (Gnome Shell crashes when recording after around 10 seconds of intense activity). Further more, there was a bug (which was fixed just after I've finished uploading the video on YouTube) which caused the cursor not to show up in the video. Anyway, you get the idea - it's not the best video but it should be enough to get an idea on how Gnome Shell looks like today (fresh GIT build):


Remember: GNOME Shell is still work in progress and a lot of improvements will be made until it's released!

If you want to try out the latest GNOME Shell from GIT in Ubuntu, check out our post: Install Gnome Shell (From GIT) In Ubuntu 10.10 Maverick Meerkat - the post is constantly updated.

How To Clone (Copy) A VirtualBox .vdi [Quick Tip]

VirtualBox hard disk

If you want to use an existing VirtualBox hard disk (.vdi) for multiple machines you can't just copy the .vdi as you can't have multiple virtual hard disks with the same UUID on the same computer. But luckily you can easily clone an existing VirtualBox hard disk - here's how to do it.


Firstly you'll need to know the path to the .vdi you want to clone. These are usually under ~/VirtualBox VMs (for the latest VirtualBox 4.0) or ~/.VirtualBox/HardDisks.

Once you find the .vdi you want to clone, simply run the following command in a terminal:

VBoxManage clonevdi /path/to/existing.vdi new.vdi

In the above command, replace "/path/to" with the path to the existing .vdi you want to clone and "new.vdi" with the name of the new VirtualBox hard disk.


That's it! You can now use VirtualBox to create a new Virtual Machine with the newly created virtual hard disk.


Update: here's an easier way of doing this (thanks to 1dollar for the tip!): simply create a copy of a .vdi and run the following command to change its UUID:
VBoxManage internalcommands sethduuid copiedfile.vdi

Install VLC 1.1.6 In Ubuntu 10.10 Maverick Meerkat Via PPA

VLC 1.1.6


VLC 1.1.6 was released yesterday, bringing security fixes and many improvements. Here's the complete VLC 1.1.6 changelog:
  • Security updates in codecs and demuxers
  • Support for RTP/PCM 24bits, audio/L24
  • Faster Webm/VP8 decoding
  • Major updates in most language translations
  • KDE and PulseAudio integration improvements
  • Subtitles fixes and improvements
  • Improvements in visualisations and interfaces
  • Codecs updates
  • Many miscellaneous fixes


As usual, Roberto @ LFFL has uploaded the latest VLC 1.1.6 in his VLC PPA (available for Ubuntu Maverick only!) so install it using the following commands:

sudo add-apt-repository ppa:ferramroberto/vlc
sudo apt-get update
sudo apt-get install vlc mozilla-plugin-vlc

Thanks to Roberto for the news and PPA

Xubuntu 11.04 To Get A New Default Theme Called Greybird [Screenshots]

Starting with version 11.04 alpha 2 (to be released on February 3rd), Xubuntu will use a new theme called "Greybird" as the default theme. The GTK theme is inspired by Elementary but there are quite a few differences between Greybird and Elementary.


Screenshots:


Xubuntu 11.04 greybird screenshot

Xubuntu 11.04 screenshot greybird


Work in progress


Currently the window borders look the same as in Elementary but this will change in the upcoming iterations. Further more, there are many elements that still need tweaking and further improvements such as the notebook-style (the tabs), selected background color, expanders and more. Also, the background color may change to a darker grey.


Why grey?


The reason the Xubuntu developers decided to go with Greybird for 11.04:

We took a conscious step from the polarizing and intense blue to something that proves easy on the eyes for everyday work (and also because one focus of the natty-release is accessibility). That's why "greybird" is not as vibrant as Elementary.

Those who are concerned about the performance when using this theme shouldn't worry as the theme uses only an engine - Murrine.


Check out the previous default Xubuntu theme - Bluebird.


You can download Greybird from HERE.


What do you think? The Xubuntu developers are always open for change so let them know what you like and what you don't in the comments below. You can also contact them @ #shimmer or #xubuntu-devel on irc.freenode.


Thanks to Simon Steinbeiß for the info and tip!

Minggu, 23 Januari 2011

Pardus 2011: KDE SC 4.5.5 With A Pinch Of GNOME In One Of The Best KDE-Based Linux Distros

Pardus 2011 screenshots

Pardus is a Linux distribution funded by the Scientific & Technological Research Council of Turkey. Even though it uses KDE, Pardus tries to make every user - including those who come from a GNOME Linux distribution - feel like home and in which the user is in control of how his desktop looks like right from the start.

Pardus 2011 comes with its own original tools: YALI (installer), Kaptan - an first boot configuration tool, PiSi (package manager) as well as many tweaks to some already existing tools. Read on to find out more!


First impressions


Pardus 2011 screenshots
(Pardus login screen)

When you first boot the Pardus 2011 Live CD, YALI installer (which now has LVM/RAID and UUID support) will guide you through the installation process. Everything is intuitive and easy to use for both novice and advanced users (the following screenshot is just one of the YALI installation steps):

Pardus 2011 screenshots


While most major Linux distributions impose their own style (theme, icons and so on), in Pardus you're in complete control of how everything looks from the beginning: when you first boot Pardus you'll meet Kaptan, an original Pardus tool that runs when you boot Pardus for the first time and lets you customize the user interface and other settings (you can choose the theme, menu, wallpaper and so on):

Pardus 2011 screenshots

Pardus 2011 screenshots


If you've never tried Pardus before, I'm sure the first impression will be "wow" for most of you like it was for me!


Default applications


Pardus 2011 screenshots
(Clementine)

Pardus 2011 screenshots
(Firefox 4.0 beta 9)


Pardus 2011 is not your regular KDE Linux distribution - you won't find KOffice (now Calligra Suite) by default but LibreOffice. Further more, Mozilla Firefox 4.0 beta 9 is the default web browser. Other default applications: SMplayer as the default video player, Clementine as the default music player, KsCD is now the default player for Audio CDs and of course most of the popular KDE applications like digiKam, Kdenlive, Kopete, Dolphin, Ktorrent, Kget, Choqok, Konqueror and so on.


Pardus 2011 screenshots
(GIMP)

Even though Pardus is a KDE Linux distribution (Pardus 2011 comes with KDE SC 4.5.5), it features some of the best GNOME applications too such as GIMP or GNOME NetworkManager 0.8.2:

The reason for using GNOME Network Manager as the default network manager application is to make it easy for its users to set up CDMA, HSPA and VPN networks.

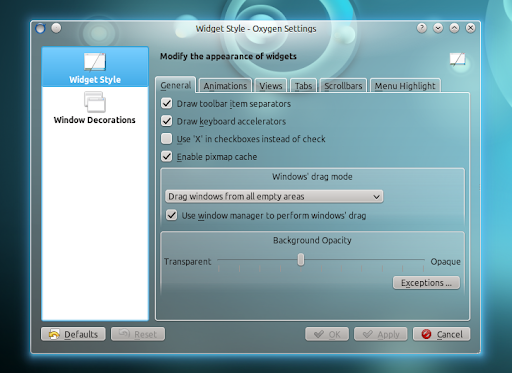
But you don't have to worry about integrating GNOME applications with the KDE look - Pardus has this covered and the latest Pardus 2011 uses KDE's Oxygen style for all the GTK apps. This is great for those who use GNOME and want to try a KDE Linux distro as they can keep using some of the applications they've got used to while trying out some of the best KDE applications too.


For a package manager, Pardus comes with its own "PiSi":

Pardus 2011 screenshots


But of course, there's also a graphical package manager too:

Pardus 2011 screenshots


Panda (Pardus alternative driver administration) is a new System Settings module which allows users to change the driver between Open Source and proprietary one for NVIDIA and ATI display adapters.


Pardus 2011 comes with KDE SC 4.5.5, Linux Kernel 2.6.37, Python 2.7.1, xorg-server 1.9.4 RC1 with improvements to the automatic driver configuration mechanism done by the Pardus developers.


Download Pardus 2011


There's much more to Pardus 2011 then I could ever cover in a post so you really need to try it out for yourself to see why Pardus is considered one of the best KDE-based Linux distributions of the moment.

Pardus 2011 is available for both 32bit and 64bit and you can download it from HERE | Pardus 2011 release notes